Deploying your first app
You can have your first application up and running on Cloud 66 in under 5 mins. Follow the steps below to see how easy it is to get your app configured, built, and deployed.
What you’ll need
Before you start, please check you have the following:
- A Cloud 66 Account — If you don’t already have one, sign up for a Cloud 66 account. Your first server is free, no credit card required.
- Application code and/or pre-built images — Application code should be hosted in a (secure) publicly accessible git repository and pre-built images should be hosted in image publicly accessible repositories.
- An account with a supported cloud provider or your own servers set up — Cloud 66 supports a range of cloud providers. Select your preferred provider from the dropdown under Step 4 below.
Once you're ready, click the green New Application button to start the process.
Step 1: Choose a source
The first thing we need is access to your code, so that we can build and deploy it for you. Click the tab below which best suits your needs:
The easiest option is to give us (read-only) access to a Github repo. To do this:
- Click Get Started
- On the next page click Link with Github
- We’ll send you to our app on Github (you’ll need to sign in)
- Once you’re signed in, click Configure & then select the Github account you wish to link to Cloud 66
- Install and authorize our Github app (you can restrict our access to specific repos if needed)
- You will be redirected back to your Cloud 66 dashboard and you can move on to Step 2.
Step 2: Define your application
Now that we have access to your git host, you can tell us which repo you want to deploy:
- Choose the repo you want to deploy and set the branch
- Choose an environment for your application
- Give your application a name (this will be used to label your application throughout the Cloud 66 dashboard, and will not be visible to public users.)
- Click Analyze - we will now scan your repo and suggest the optimal settings
Step 3: Configure and build
Static generation or server-side rendering?
If we detect that your application uses Svelte we will ask you to confirm whether your application is statically generated (AKA prerendered) or uses server-side rendering.
Statically generated applications are rendered entirely during the build process and then then deployed as flat files. For applications that are rendered server-side, the application code runs on the server and renders pages as required. Apps that use server-side rendering will not build if you attempt to deploy them using static generation methods, and vice versa.
If you’re unsure of which kind of app you have, you should read the official documentation and examine your code to confirm before you try to deploy.
Once the analysis is complete you’ll see a yellow information box that you can use to verify the analysis is correct.
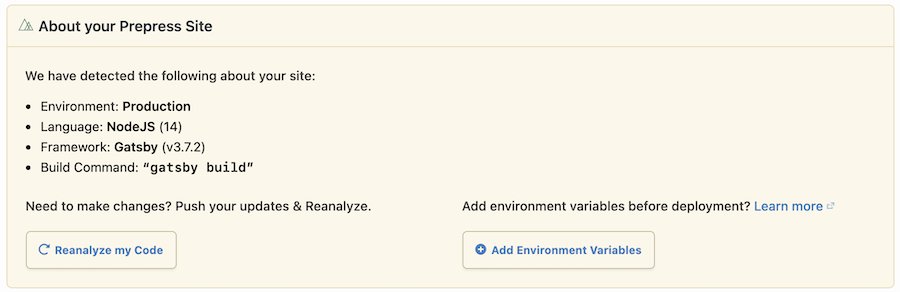
If there are any problems you can make changes and click Reanalyze my code. If necessary, you can also add environment variables.
Step 4: Add a cloud provider
A. Configure access to your cloud provider
We need access to your cloud account in order to provision and manage static sites on your behalf. How you configure that access differs from provider to provider. Because static sites rely on object storage, some of our cloud providers do not currently support static site deployments.
Select a cloud provider from the dropdown for more help.
First you need to configure your AWS account to allow Cloud 66 to access it:
- Log into the web interface for your AWS account
- Click on the name of your account in the top right corner of your AWS account, and select My Security Credentials.
On the next screen, some users will be asked to choose between Security Credentials and IAM users. We support both methods but we recommend that experienced users select IAM (Identity and Access Management) for better security because allows you to set permissions for specific users. Click on your chosen option below for more instructions.
B. Add your cloud provider as a deployment target
To add your cloud credentials click the Add a Deployment Target button. This will open a panel that will enable you to grant Cloud 66 access to your provider.
Click the green Add Deployment Target button once complete.
Our customization section has more details on the available options.
Step 5: Deploy your app
When you’re satisfied with your configuration, click the Start Deployment button. During the build and deployment process you can view the log to see what’s happening behind the scenes.
You can also close the window and come back later. We will email you once the application is deployed (or if it fails).
The full build and deployment process may take 15 minutes or more because Cloud 66 needs to provision components and resources from the ground up. You can close the window and we will send you an email when the deployment is complete.
Customizing your app
If your application relies on specific components or non-standard settings or package versions then you can easily customize your configuration to match your requirements.
The method you use to configure a component depends on the nature of the customization. The table below will help you find the right tool:
| Customization required | Configuration tool |
|---|---|
| Specific versions of a framework or package | Manifest file |
| Environment Variables | Dashboard or Toolbelt |